In this post, we will walk you through how to set up automatic trade syncing between your DAS Trader Pro account and TradesViz.
This post assumes that you have read the basics about auto importing in TradesViz.
Overview
DAS Trader Pro is a popular direct-access trading platform used by active stock, options, and futures traders. With TradesViz's auto-import feature, your trades from DAS will be automatically synced to your TradesViz account daily at 5:00 a.m. EST - no manual CSV exports needed!
Please note: As long as you execute trades via DAS Trader Pro, you can sync your trades - it doesn't matter what broker you use!
Supported asset types: Stocks, Stock Options, and Futures.
⚠ Important: Two-part setup required
Setting up DAS auto-import requires completing steps on both the DAS platform and TradesViz. You must complete Part 1 (DAS side) first — without signing the consent rider on DAS, the sync cannot work even if you fill out the form on TradesViz.
Please follow the official DAS Trader and TradesViz Integration guide from DAS for step-by-step screenshots: https://dastrader.com/docs/das-trader-and-tradesviz-integration/
Part 1: Enable Integration on DAS (Must Do First)
You must sign the Third Party Drop Copy Consent Rider on the DAS platform before doing anything on TradesViz. Without this step, DAS will not transmit your trade data and the sync will not work.
Before you begin
- The email address you use for the DAS Market Data Agreements must be the same as the email you use for TradesViz.
- For the smoothest process, complete the DAS consent rider between 5 AM and 11 PM EST.
Steps on DAS
- Open DAS Trader Pro and navigate to Help > Market Data Agreement.
- In the portal, click on the Optional tab.
- Find "THIRD PARTY DROP COPY CONSENT RIDER (Optional)" and click Sign.
- Read the agreement carefully. If you want to include your historical trade data (up to 6 months), select Yes and fill in the date range.
- Complete your signature and click "I agree" at the bottom.
- You will receive a confirmation email from DAS.
Timing notes from DAS:
- Current-day data (regular daily data) is normally sent the day after the request is completed in the Agreement Portal at 4 AM EST.
- If you are integrating historical data, it is sent the next day at 4 AM EST after completing the agreement. The current-day data is then processed the following day.
- Historical data is only available for the previous six months.
Part 2: Connect on TradesViz
After you have completed the consent rider on DAS (Part 1 above), follow these steps on TradesViz:
Step 1: Navigate to Auto-Import
Go to your TradesViz Import page and select the "Auto-Sync" tab. Choose your trading account from the dropdown, then select "DAS Trader Pro" from the broker list and click "Connect account".
Step 2: Fill Out the Connection Form
A form will appear requesting the following information:
- Full Name: Your full name as registered with your broker
- Broker Name: The name of your broker (e.g., Cobra Trading, Interactive Brokers, CenterPoint Securities, etc.)
- DAS Login ID (User ID): This is the username you use to log into DAS Trader Pro. You can find it in the title bar of your DAS platform window.
- DAS Email Address: The email address associated with your DAS account
Where can I find my DAS User ID?
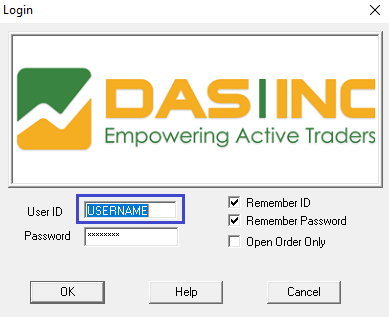
Your DAS User ID is displayed in the title bar of the DAS Trader Pro application window. It's the username you enter when logging into the platform.
Step 3: Confirm and Submit
Check the consent checkbox confirming that you understand your information will be sent to DAS Inc. for verification purposes, then click "Connect".
Step 4: Wait for Verification
Your request will be submitted to DAS for verification. Please allow up to 3 business days for the setup to be completed. You will receive a confirmation email once your account has been connected.
How the Sync Works
- Once your account is verified and connected, DAS will automatically transmit your trades to us.
- DAS sends trade data to us at 4 AM EST. Our sync then picks it up at 5 AM EST.
- Note: There is a delay on DAS's side — all trades from the current day will be available for sync the next day.
- If you chose to include historical data in the DAS consent rider, that data is also sent the next day at 4 AM EST. Historical data covers the previous 6 months.
- If you've already configured your trade synchronization with DAS, you won't need to take any further action.
Important Notes
- This connection gives us READ-ONLY access to your trade data. We do NOT have any trading or account modification permissions.
- DAS supports stocks, stock options, and futures trade data.
- The email address you used in the DAS Market Data Agreement must be the same email you use on TradesViz.
- Historical data import depends on what DAS makes available (up to 6 months). For best results, manually import your historical trades via CSV before setting up auto-sync, and set the "Sync from date" to the day after your last imported trade.
- You can also manually trigger a sync at any time from the connections list on your Import page.
⚠ Sync not working? The most common reason is that the DAS-side consent rider (https://dastrader.com/docs/das-trader-and-tradesviz-integration/) was not completed. Without signing the Third Party Drop Copy Consent Rider in DAS (Help > Market Data Agreement > Optional tab), DAS will not send any trade data, and the sync cannot function.
Troubleshooting
If your auto-import is not working after the setup period:
- Verify you completed the DAS consent rider: Go to Help > Market Data Agreement > Optional tab in DAS and confirm the Third Party Drop Copy Consent Rider shows as signed. This is the #1 reason syncs don't work.
- Make sure the email in the DAS agreement matches the email on your TradesViz account.
- Double-check that your DAS Login ID was entered correctly on TradesViz.
- Ensure that at least 3 business days have passed since your request.
- Contact us at [email protected] if you continue to experience issues.
For the full step-by-step guide with screenshots from DAS, refer to the official DAS Trader and TradesViz Integration documentation: https://dastrader.com/docs/das-trader-and-tradesviz-integration/
That's it! Once both sides are set up, your DAS Trader Pro trades will be automatically imported into TradesViz every day, giving you powerful analytics and journaling capabilities for all your trades.
If you have any questions or concerns about the DAS Trader Pro auto-sync integration, please send us an email at [email protected].