We have introduced auto-sync features for many brokers/platforms and as we continue to lead the push to complete trade journaling automation, with this feature, we are getting very close to it!
Thousands of traders using NinjaTrader to trade futures, and stocks can now automatically sync their trades in real-time to their TradesViz journal! No need to pay any extra for indicators! No extra charges!
April 2023 Update: You can now send screenshots to be automatically attached to your trades! See the bottom of this blog post for updates! Make sure you use our most recent indicator by downloading the indicator via the instructions below.
Let's dive in and see how you can do this in this blog post.
Disclaimer (READ):
-
Please note that TradesViz does not take any responsibility for missing trades resulting from network issues or wrong setups.
-
Setting up real-time sync is an involved process and should be thoroughly tested with 1 demo account before moving on to a live account.
-
ALL instructions on this page MUST be read carefully in order to setup the indicator correctly.
-
We do not guarantee performance for more than 2-3 accounts at the same time due to technical limitations.
-
If you trade with platforms like Tradovate or Rithmic, it's suggested to sync from such platforms at the end of day rather than real-time syncing as it's easier for new traders.
-
The indicator should NOT be used with any type of automated trading systems/bots.
-
The indicator provided by TradesViz is as-is without any guarantees.
-
Proceed to download and use the indicator ONLY IF YOU AGREE TO THE ABOVE TERMS.
Download and install the auto-sync indicator from this link (free) (Note: Only tested for NinjaTrader 8)
- To install the indicator, click on the "Tools" option in the menu bar in the NinjaTrader command center and click on "Import" and then "NinjaScript Add-On".

- Now, navigate to the ZIP file you just downloaded from the link above and click open.
- After the import was successful, go to any chart where you are executing trades and click on the "Indicators" icon at the top.
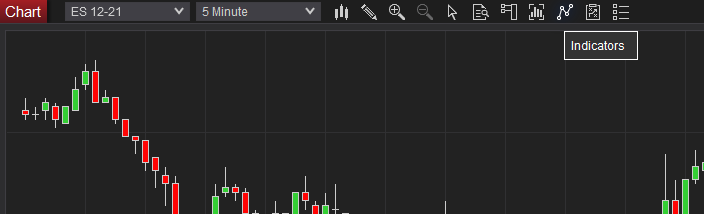
- Now select "TradesViz_AutoSyncTrades" indicator and click "add" at the bottom.
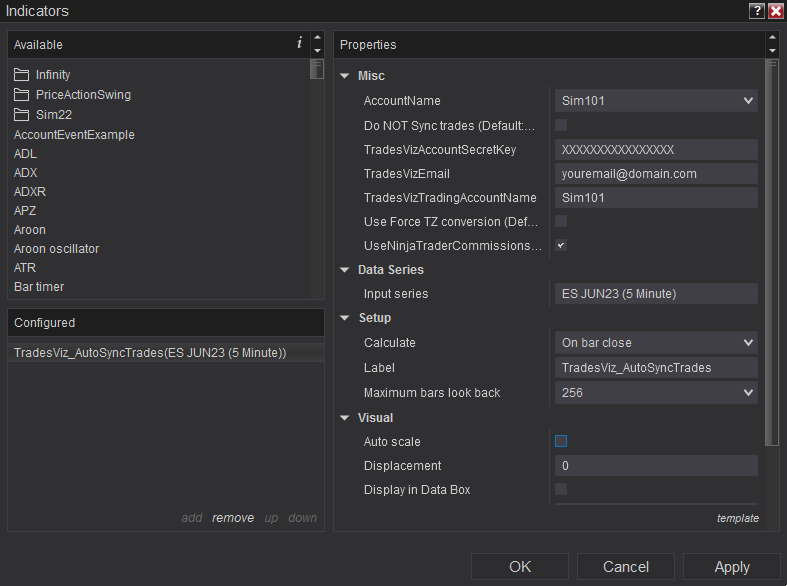
Select your NinjaTrader account (AccountName)
Enter your TradesViz primary email (TradesVizEmail)
Your account secret key (You can find your account secret key on your settings page (tradesviz.com/accounts/settings))
Enter your TradesViz Trading Account name to which you want the trades to be sent (case sensitive). You can find your trading account name in the trading accounts dropdown on the home page in the trading accounts management page here: https://tradesviz.com/accounts/tradingaccounts/.
Leaving this blank or filling this incorrectly will result in all trades being added to the first (alphabetical) trading account in your TradesViz account.
Finally, uncheck the "Visible" option so that this indicator won't take up any space in your chart at the bottom and click "Apply" - you are all set!
Only check "Use Force TZ conversion" if your timezone is NOT US/Eastern and if you are having issues with timezones of your trades on TradesViz.
Only check the "No NOT sync trades" option if you are using the indicator only to send screenshots and if you already have another indicator in another chart sending trades to TradesViz.
(Note: If you have multiple accounts in TradesViz, make sure the AccountName in NinjaTrader matches your TradesViz account name to which you want the trades to be routed)
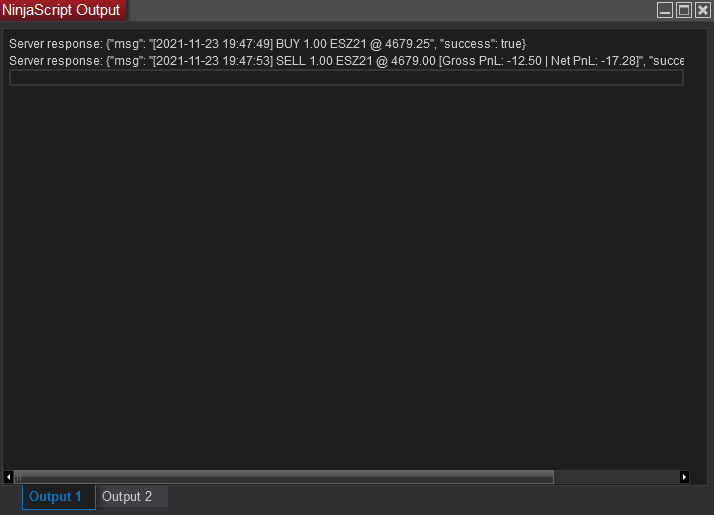
- Now as you execute trades in the chart, your executions will be synced live to your TradesViz journal. You can even check this by inspecting the NinjaScript Output window.
- To open the NinjaScript Output window, go over to the NinjaTrader command center and click on "New" in the menu bar at the top and click on "NinjaScript Output".
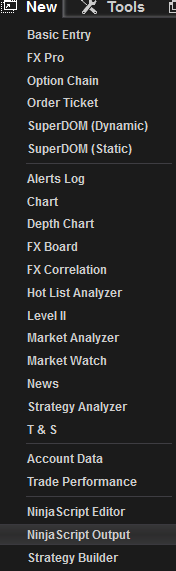
- You should see an empty box appear now. Whenever you execute a trade, you will see the trade logged in this box. If you see any errors, you can contact us for help.
That's it! You can check your journal after you have done trading - all your trades should be there and ready for you to add notes, tags, and analyze them!
Some important notes:
- The indicator only has access to your execution data. The data is sent directly to our servers safely and is authenticated via your email and account secret key.
- By default, the TradesViz system will search among your TradesViz accounts for an account with the same name (EXACT MATCH - INCLUDING CAPITALIZATION) as the account you have filled in the Indicator settings and add your trades to that account. If such an account does not exist in your TradesViz account, it will simply add the trades to the first trading account (alphabetically).
- At the moment, only futures and stocks are supported.
- If you do not want the system to use NinjaTrader's commissions, uncheck the "UseNinjaTraderCommissions" box in the Indicator settings
- If you have multiple charts open, make sure that the indicator is only added to 1 chart
- Use the indicator on the chart on which you are making executions
- If you have multiple charts/symbols you are trading, you have to make sure you are selecting the correct accounts in the indicator settings
Common issues/FAQs:
A: This could be due to several reasons:
- There could have been an error with the datetime - check the Ninjatrader output log. If you see a date error, make sure to select D-M-Y or M-D-Y, etc., based on the date format shown in the error log.
- If you see a message saying execution was added/recorded successfully, then refresh your TradesViz table by clicking on any column header - you should see the new execution/trade.
- If you do not see any output log, make sure you have added your email id, account secret correctly.
- If you are on a free account, you will only be able to sync stock trades - please start a free trial to sync your futures trades
A: Create as many charts as accounts in NinjaTrader. For each chart, add the TradesViz plugin and make sure to select different accounts on the plugin settings in each of your charts. Also, make sure you have trading accounts with the same names as the NinjaTrader account (display name) in TradesViz so that the trades are correctly redirected to the appropriate accounts.
Examples:
- If you have 5 charts of NQ open all of which are linked to an account named ACCT1 (as an example) in NinjaTrader, then add the indicator to ANY one of the 5 charts and select ACCT1 as the account from the dropdown in the indicator settings.
- If you have 5 charts of NQ open AND 5 ES charts all of which are linked to an account named ACCT1 (as an example) in NinjaTrader, then add the indicator to ANY one of the 10 charts and select ACCT1 as the account from the dropdown in the indicator settings.
- If you have 5 charts of NQ open where all 5 are linked to an account named ACCT1 (as an example) in NinjaTrader AND 5 charts of ES open where all 5 are linked to an account named ACCT2 (as an example) in NinjaTrader, then do both of the following:
- Add an instance of the indicator to any one of the 5 NQ charts linked to ACCT1 and select ACCT1 as the account from the dropdown in the indicator settings.
- Add an instance of the indicator to any one of the 5 ES charts linked to ACCT2 and select ACC2 as the account from the dropdown in the indicator settings.
Always check the output log if you think there are any trades missing! It is very likely that your indicator settings are incorrect if that is the case.
With this feature, we hope to give all NinjaTrader users a solid trading journaling experience with the best features available at the moment compared to any other competitors!
Tips:
- If you have multiple charts with multiple tabs, make sure to create another chart for that account without any tabs and add the indicator to that chart. If you add the indicator to a chart with multiple tabs, you may notice freezes/slowdowns.
- The goal is to have a minimum no. of indicators required to send ALL your data to the TradesViz servers only once without duplicates (even though we have checks for duplicates and do de-duplication).
- If you are using the indicator to only send screenshots, check the "do NOT send trades" option in the indicator settings - this is to make sure the indicator is not sending duplicate trades - i.e. not sending the same data multiple times.
- If you are seeing slowdowns, please make sure to use only the required no. of indicators (i.e one per account) and it is suggested to use the indicators on normal time-based charts (instead of tick charts). Even if you are trading on a tick chart, you can create a new normal chart and add your indicator there with the correct settings and it will pick up the trades.
April 2023 Update:
You can now send screenshots from the indicator directly to your TradesViz trade. All you need to do is download our most recent indicator (link at the top of the blog), remove your existing indicator(s), and install this. Once installed, you will see a green button at the top of the chart the indicator is installed on like below:
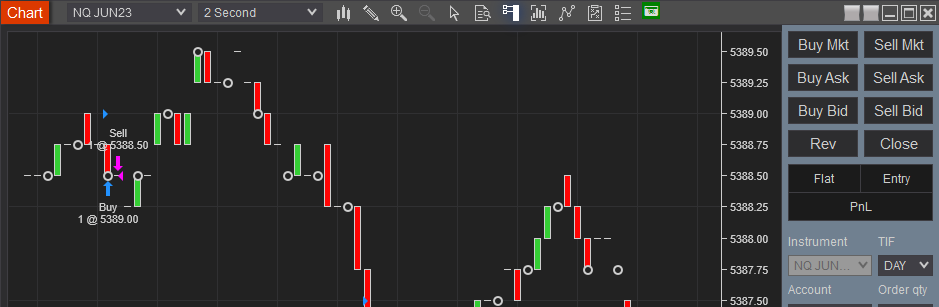
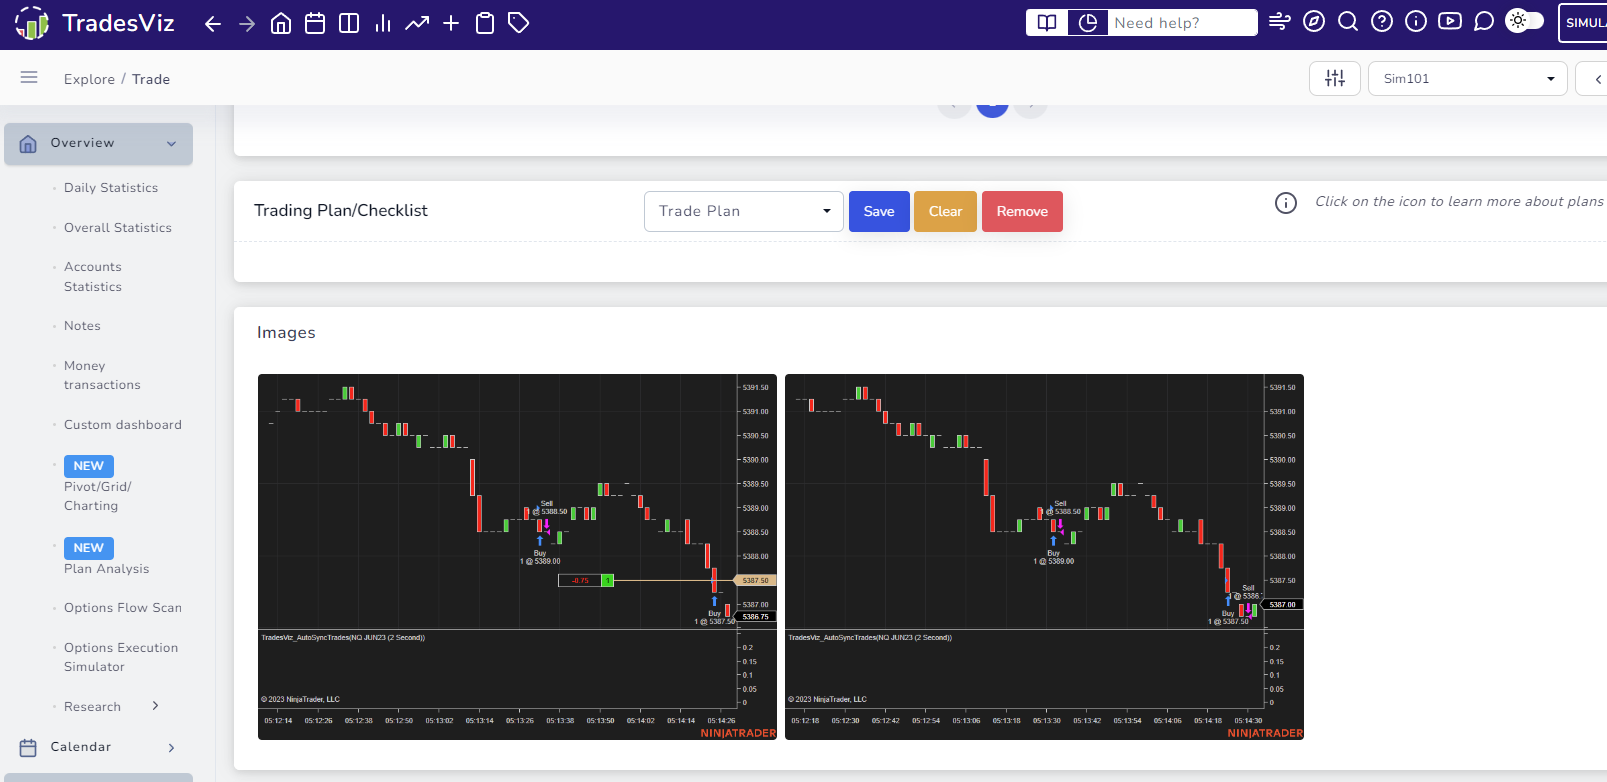
Click this button to send the screenshot of the current chart directly to your most recently synced trade on TradesViz. Here is how it will appear on TradesViz:
Notes about the screenshot feature:
- When sending screenshots, make sure to wait for a few seconds between each send action.
Screenshots can only be sent from the charts to which the indicator is attached
You can now add the indicator to any chart you want and check the "do not sync trades" option to just use the screenshot option while your other indicator(s) from other chart(s) send the data to TradesViz. This is the most efficient setup.- Screenshots can only be sent AFTER a trade has been made and synced with TradesViz
- Screenshots are automatically attached to the most recently synced trade from NinjaTrader to TradesViz
- You need to be at least on a Pro account to send screenshots
March 2024 Update:
While we have not posted any updates, we have greatly improved the performance and reliability of the indicator over the last year. With the latest update (v2.2.02), we introduce automatic chart account detection. This means, there is no need to have as many indicators as charts to sync your trades if you are trading multiple accounts. After installing this indicator, you will see a new option called "Switch Accounts based on charts". Once toggled, it will pickup the selected account from the chart trader and even trades executed from this account will be synced to your TradesViz account.
If you have any feedback for us or would like us to add any features, please let us know by emailing us at [email protected]