We will now explore how to pair your TradesViz account with your Angel One account.
Update: 29th Sep 2023
We no longer support 100% auto sync for Angel as the access is valid for 24 hrs only Therefore, you will have to sync Angel Brokerage every day by manually triggering the process as described below:
- Visit tradesviz.com/import
- Select the trading account you want to import your trades into
- Select "Angel Brokerage API" as the platform
- Scroll down the page and click on the "Login & Sync Angel Brokerage" button
- In the popup box that appears, you can read more about how this sync works. Now click on " Angel Brokeragelogin" and you will be redirected to an Angel Brokerage-hosted webpage.
- Enter your credentials here (Note: we have no access to this as it's on Angel Brokerage's website) and complete the login process.
- Once you have completed the login process, you will be redirected to the import page and the trades import will start automatically.
A few caveats:
- Since we do NOT store ANY information - i.e. access tokens or any such identification mechanism, you need to do this process whenever you want to sync your trades. The main reason for this is that Angel Brokerage clears all session data every day - so even if we were to store access and refresh tokens, it would be invalid the next day.
- You need to sync your trades every day so that you do not lose information - Angel Brokerage only provides information for trades executed on any given day. For example, you cannot sync yesterday's trades today.
This post assumes that you have read the basics about auto importing in TradesViz.
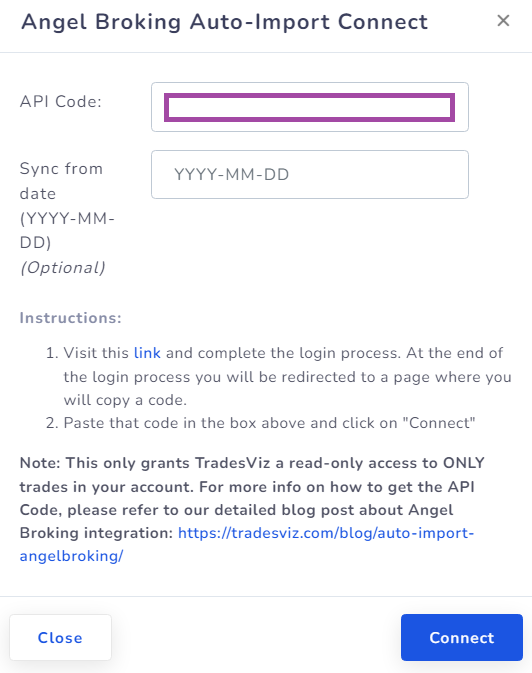
Once you select your trading account and broker as "Angel Brokerage" on the trade auto-import page, a popup box will appear when you click on the "Connect account" button.
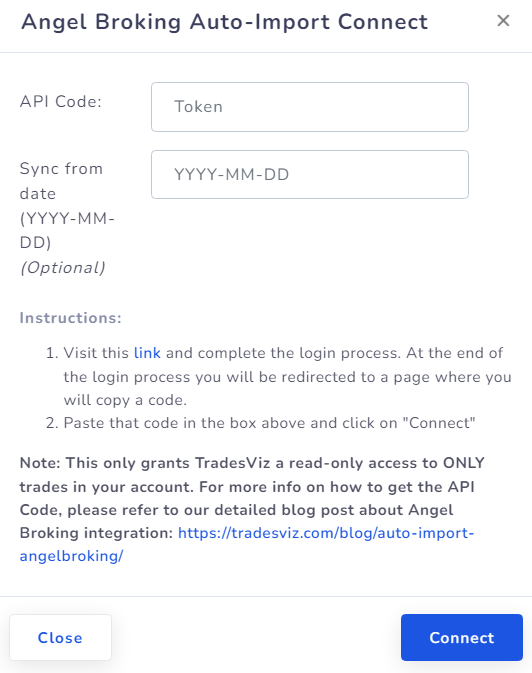
Here are the steps you need to follow:
- Click on the link in the instructions in the popup box shown in the picture above.
- This will redirect you to a secure Angel One webpage where you need to enter your credentials to authenticate that you are the user of the Angel One account. Note that we have no access to any information in the subsequent pages after you click on the link in the instructions - all actions are done via Angel One's secure pages. You can check the URL in the browser to verify this.
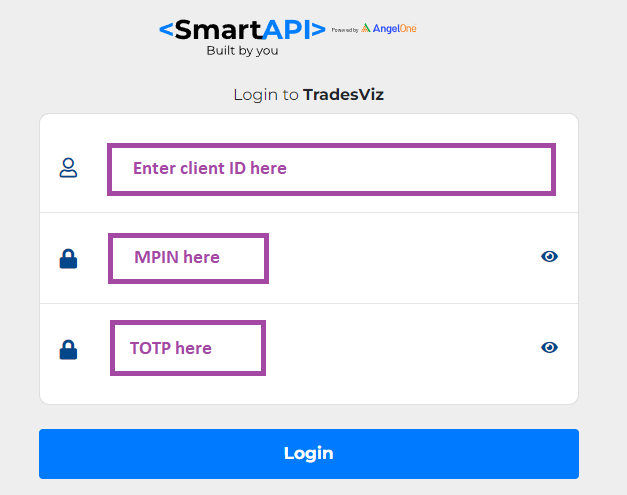
Client ID is NOT your email ID
MTM and TOTP has to be set as per Angel broking's new regulations
In case, you don't have MPIN or don't know how to generate it please visit - https://trade.angelone.in/ OR use Angel Mobile App. Visit https://smartapi.angelbroking.com/enable-totp to set TOTP using an authenticator app.
- Once you complete the authentication flow, you will be redirected to a TradesViz.com page where you must copy a code and paste it into the popup box shown as the first image in this blog post.
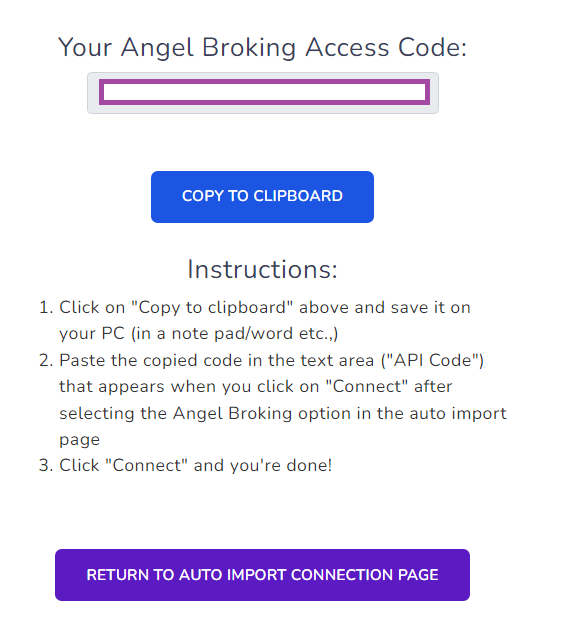
- Once you return to the tradesviz.com's import page, click on the "Auto-import trades" tab, follow the same instructions of selecting the trading account and brokerage platform (Angel Brokerage) and now paste the code in the text field.
That's it! You are now connected to Angel One and your trades will be auto-synced every 24 hrs! You can change the advanced import settings and turn on or off the auto-sync by clicking the auto-import settings on the same import page.
If you have any questions regarding your connections, please contact us at [email protected]!